Modifying pixels using for loops#
We can access the color information of certain columns of images in a similar way. We still have the 3X4 image saved as a 2D list our_image.
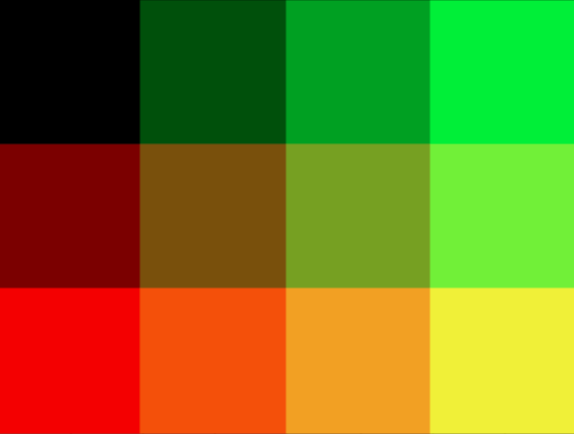
The RGB values of each pixel is as follows:
(0,0,0)   (0,80,0)   (0,160,0)   (0,240,0)
(120,0,0) (120,80,0) (120,160,0) (120,240,0)
(240,0,0) (240,80,0) (240,160,0) (240,240,0)
In the previous slide, we managed to change one pixel from (0,0,0) to (0,0,225). But, what if we want to make every pixel at the bottom row to have B component as 225? Let’s first bring back the code that accessed the bottom row.
for column in range(4):
    print(our_image[2][column])
Now, instead of printing each pixel, let’s save it to a temporary variable temp_pixel.
for column in range(4):
    temp_pixel = our_image[2][column]
Then for each iteration, temp_pixel is assigned with a tuple that has the color information of the corresponding pixel. To be specific,
columnis0at the initial iterationtemp_pixelis(240,0,0)
columnis1at the next iterationtemp_pixelis(240,80,0)
columnis2at the next iterationtemp_pixelis(240,160,0)
columnis3at the next iterationtemp_pixelis(240,240,0)
For every iteration,
temp_pixel[0],temp_pixel[1],temp_pixel[2]indicate the R component, G component, B component, respectively. Therefore, we can create a new tuple(temp_pixel[0], temp_pixel[1], 255)for each iteration and assign the newly created tuple back to the pixelour_image[2][column].
for column in range(4):
    temp_pixel = our_image[2][column]
    our_image[2][column] = (temp_pixel[0], temp_pixel[1], 255)
As a result, the RGB components become:
(0,0,0)     (0,80,0)     (0,160,0)     (0,240,0)
(120,0,0)   (120,80,0)   (120,160,0)   (120,240,0)
(240,0,255) (240,80,255) (240,160,255) (240,240,255)